Follow Me on Pinterest

Monday, December 24, 2012

Using a gym bag as a diaper bag... the ultimate re-purpose


One thing I will never understand is the idea of the designer diaper bag! Nothing like throwing used burp rags, and poop-exploded onesies into a $300 dollar coach bag. Plus, lets be honost you'd rather have your hubby carry the bag but the massive diamond studded man purse just isn't a good look on him. So, here is my solution. GYM BAG!!!

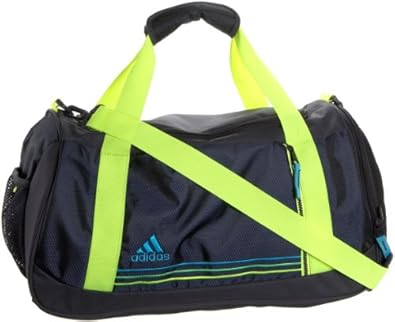
I used a small gym bag for our 20 month old. It has a shoulder strap to be worn as a messenger bag or zip out straps to become a backpack, which works great for hanging on the stroller handles. The fabric is tough and versatile, easily washable and the bag zips all the way closed. There is a place for a water bottle which doubles as a sippy cup holder and pockets for storing diapers, cream, wipes etc.


Here are some pics of my bag

One other feature that makes an amazing diaper bag feature...
shoe side pocket!!! shut the front door.... a place to shove all the dirty baby crap in the bag that keeps it isolated and is easy to clean. AMAZING.

My friend has two kids under 2yrs and was recently carrying 3 diaper bags!!! Seriously. She had one for each kid since they have different needs and because her boys are messy she had a third bag that she  used to throw the dirty crap in.

I bought her this bag as a present.


It's amazing. What a simple thought for re purposing. 


Tuesday, December 11, 2012

DIY pattern for surgical scrub or chemo hat


Women's Pixie Scrub Hat with 2 tone


 After lots of searching I could never find a pattern/guide to making scrub caps so after much trial and error I have a pattern and decided that I was going to make a guide for other people to use! I understand that there are a million ways to make hats but this is just something I'm putting out there for anyone who's interested :)

**UPDATE**
I have added drawings with more directions to try and clarify things. I am clearly not an artist.. haha

Materials


5/8 yard of fabric (main color)
6 inch strip of fabric (contrast color)
5 inches of 1/2inch elastic
basic sewing equipment (thread, pins, needles, iron)

Directions

-Begin by pre-washing/drying and ironing your fabric

-Draw a pattern for the top of the hat, This is a standard 12x12 piece of scrapbook paper drawn out in a "toilet seat" shape, this picture was taken as an angle but it is 12x12


**Note: If you have a lot of hair or a bun that sticks far off your head make this part of the pattern longer and wider


Cut your pattern and place it on your fabric (I have used some old remnant fabric to give a better idea of the places that will be cut later) Sorry this pic is a little blurry but you get the idea...


(see drawing under photos for better reference)
 Once the top is cut out you want to fold the fabric "hot dog" style leaving enough overlap to cut out tails


fold the fabric "hamburger" style


Get ready to cut out the body of the hat 
NOTE** be sure that the material is folded correctly so that this comes out as 1 piece 


**ADDING THE 2nd COLOR**
line up the background color against the hat using the center line as a guide, then fold over (hotdog), pin and sew the, background into place from the backside of the fabric


Then trim the excess 


sew the other side of the contrast color on


 Now you fabric should all be 1 piece. 


Fold the fabric in half "hot dog" style at the center line so you are looking at the inside and sew around the fabric to create a tube (this means don't sew the edges of the ties yet)


Using the holes left in the ends of the ties flip the fabric inside out so that you are looking at what you want to be the outside of the hat.


Iron the fabric so that the seams are nicely presses along the edges
Now grab the top piece and begin pinning it to the body piece starting at the center


This is what it should look like when it is pinned


 Sew the 2 pieces together and sew the ends of the ties so there are no longer any holes


Cut a piece of elastic a little shorter than the gap you have to fill 


Sew the elastic to the edges to tack it in place


 Fold the excess material over the elastic and using your hands to stretch the band sew in a zig zag stitch over the elastic and material


And that's all there is to it